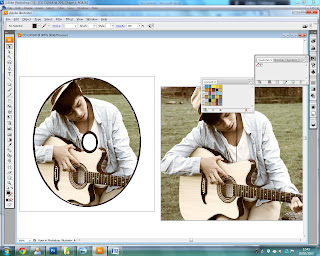
The creation of the disk of the digipak was fairly simple. I first used photoshop, to filter the original picture again and turned it into a vintage style. I created a new layer and created a circle that is similar to a disk. I placed it on top of the picture and on an area of where I want the picture to appear on the CD. I then created a background copy of the same picture and right clicked on that layer and selected Rasterized Layer.

With this option I am able to delete the areas I don't on the picture and keep the one that has the circle on top. I proceeded on using the magic wand to delete the area and left with a part of the picture in a circular shape. This is what it looks like when I moved the circle from the picture.

I got my wanted results and so I saved the picture on photoshop on a PDS file so the resolution of the picture is clear. I then opened it in Adobe Illustrator and added another circle which is the background and also used the eraser tool to make a circle in the middle to make it look like a real CD. Finally I added the same picture on the back so when the CD is taken out, the same picture is on the back as well.
I made another version of my Disk Design because I thought the picture for the first design could be used for the front of the CD. When I created the draft for the second version, I thought it looked a lot better and looks like a real CD.


No comments:
Post a Comment